Share Your Creations
There are several ways to share your creative work with the outside world. We'll walk you through them.
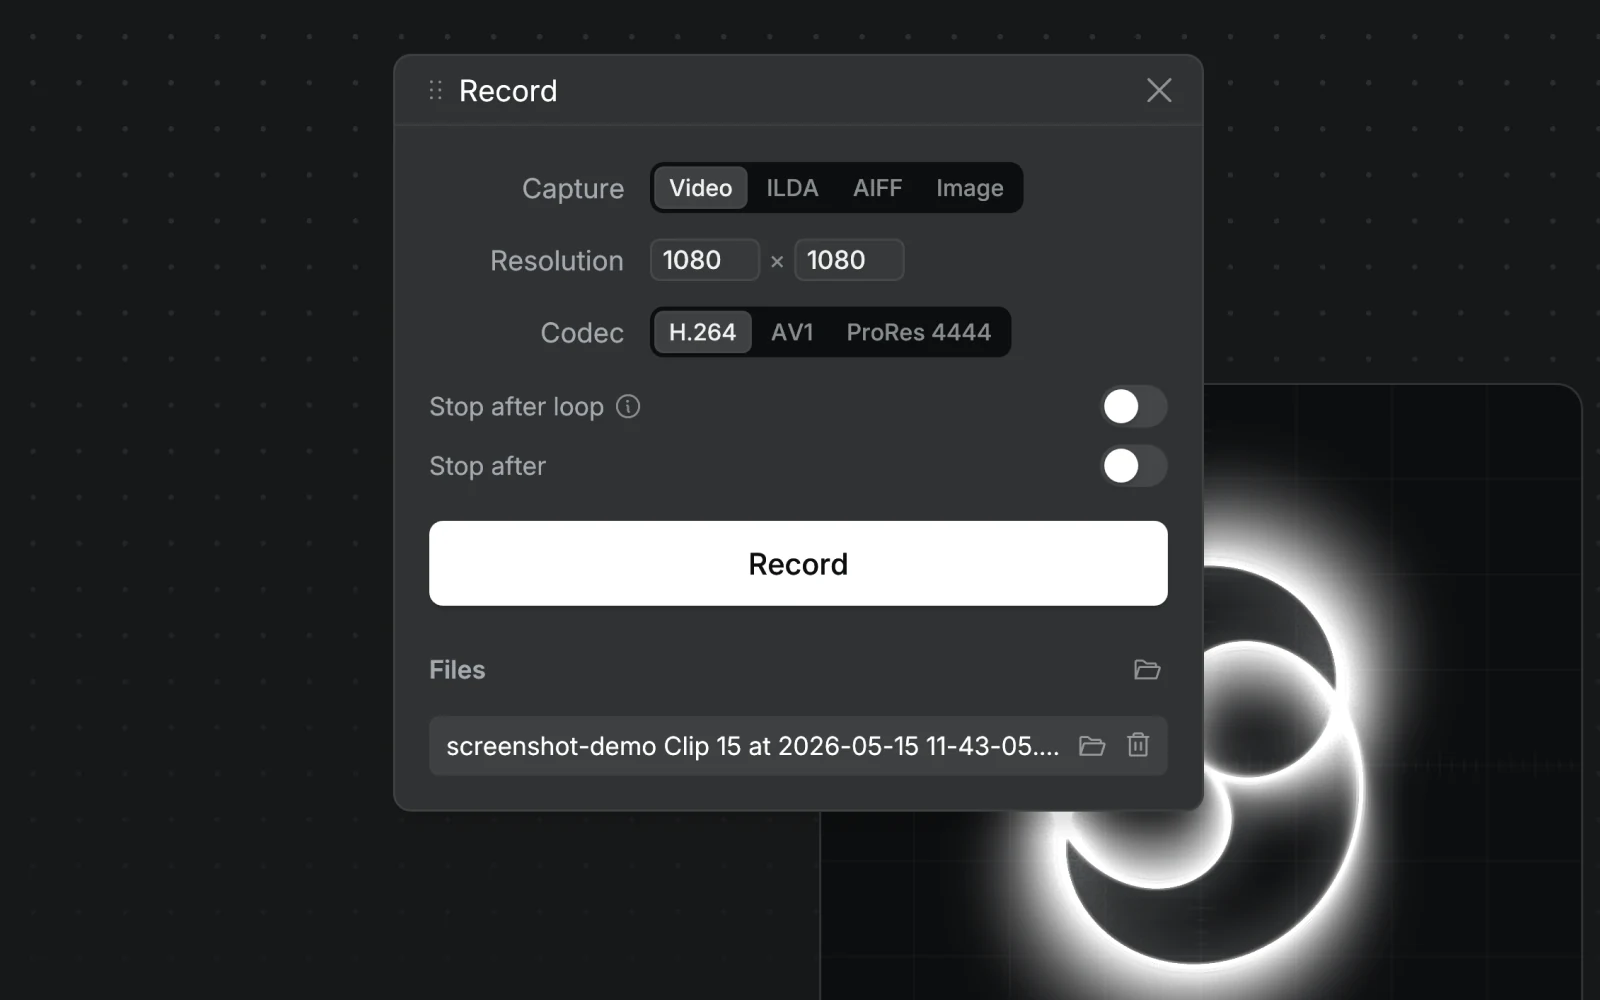
Record a video
If you want to share through social media, forums or email, the best way is to record a video. We've made a short video showing you how to do it:
When saving the video, you have the choice between three codecs:
- H.264 (.mp4): Best for quick sharing and social media.
- AV1 (.mp4): Higher quality at smaller file sizes, but encoding is slower than real-time. The recording finalizes after you stop.
- ProRes 4444 (.mov, macOS only): Lossless with alpha channel support. Best for compositing in other programs at the cost of file size. Enable the checkered background in preview settings to get a transparent background.
Resolution is configurable in the Record window. Open it with View → Record (CmdCtrlCmd/Ctrl + R) while a clip is selected. During a recording, click Stop Recording in the right panel, just above the Timecode and BPM boards, to end it. Finished files appear in the Record window's Files list, which also opens the recordings folder.
The recording uses your current preview settings. Line width controls stroke thickness and afterglow renders light trails from previous frames, so what you see in the preview is what you get in the video.
Record as ILDA
When you want to play your creations on a laser without a computer being attached to it, recording as ILDA (.ild file) is the way to go. It's also useful for sharing with other laser operators who don't have Modulaser, or for importing your creations into other laser software.
ILDA has different formats and not all ILDA readers support all of them. Modulaser supports Format 1 and 5. Format 5 is the default and preferred format. Try it first, and if your target software doesn't read it, fall back to Format 1 which uses a more limited color palette. In Format 1, the Color palette switch embeds the 64-color palette in the file.
The workflow is the same as recording a video. Open the Record window, select ILDA, and hit Record.
Record as AIFF
AIFF export produces standard 16-bit PCM AIFF files with LaserAnimation-style laser data for AVB laser DACs. Each frame becomes multi-channel audio samples with interleaved laser data.
Two channel modes are available:
- XYRGB + DGC (6 channels): X, Y, Red, Green, Blue, and a DGC zone channel. Blanked points have RGB zeroed.
- XYRGB (5 channels): X, Y, Red, Green, Blue. Blanked points have RGB zeroed.
The sample rate is selectable as 48, 96, or 192 kHz (default 48 kHz). Scene markers (on by default) keep the file compatible with LaserAnimation AVB devices. Turn them off to edit the AIFF in an audio editor. Open the Record window, select AIFF, choose your channel mode and sample rate, then hit Record.
Record as image(s)
You can capture a still image of your creation in SVG (vector) or PNG format. Use the Capture button for a single frame, or Record for a continuous image sequence.
Output chooses how a recording is saved: Folder (the default) writes one file per frame, and Single file combines every frame into one SVG, or one long-exposure PNG.
SVG preserves vector data as paths. Your line width setting maps to the SVG stroke width, and Resolution sets the SVG's width and height (default 1080 × 1080).
PNG saves numbered files in a folder (000001.png, 000002.png, etc.) by default. You can configure the resolution and choose between a transparent or black background using the checkered background toggle in preview settings.
Afterglow only accumulates in Single file output. In Folder output each frame is saved on its own, even though the preview shows full persistence while recording.
The SVG format is perfect for using with pen plotters.
Capture frame rate
For SVG, ILDA, and PNG recording, a Frame rate setting controls how many frames per second are captured (default 30 fps). Lower values like 2 to 10 fps are useful for pen plotter or CNC workflows where fewer frames are needed.
This temporarily changes the pipeline tick rate during recording, so the preview shows exactly what's being captured. When recording stops, the tick rate reverts to its previous value. Don't use this with active laser output since it affects DAC output rate too.
Auto-stop options
Stop after
The Stop after switch records for the number of seconds you set (0.1 to 300, default 5), then stops automatically.
Stop after loop
Enable Stop after loop to automatically stop when all oscillators, modulators, sequencers, and animations complete one full cycle. It also detects when a file sequence (ILDA, SVG, or OBJ) finishes one playback loop. This gives you a recording that loops cleanly: useful for social media posts, ILDA playback on standalone hardware, or tiling an animation in other software.
Modulaser analyzes the active clip and calculates when all timing sources align back to their starting point. It shows an estimated duration next to the switch. If something prevents a clean loop, like an audio modulator or NDI input, you'll see a warning.
If your clip plays a file sequence, set its playback mode to Loop with a positive speed. Bounce, Random, and the Once modes stop the recording partway through their real cycle, and they don't raise a warning.
For the shortest loops, use harmonic frequency ratios between oscillators (e.g. 1 Hz and 2 Hz, not 1 Hz and 1.3 Hz). BPM-synced oscillators naturally align since beat divisions are always harmonic. If the estimated loop is longer than expected, click Shorten loop to snap frequencies to nearby harmonic ratios.
Share your file
You can also share your whole Modulaser project with others who have Modulaser. Find the file you've been using (tip: it ends with .modu) and share it through whichever platform you want.
If your project uses external files (for example you imported ILDA files), you can use File -> Export so you get a ZIP containing your .modu file together with all external files.