How To Use MIDI
While you can use Modulaser perfectly fine with a mouse and keyboard, it can get boring after a while, pulling all those virtual knobs. With a real-life MIDI controller you'll get real-life knobs. This also works a lot better if you're going to give a life performance on a party. Bonus: a MIDI controller looks cooler at a party.
In this guide we'll explain how you can connect and configure your MIDI controller to work with Modulaser.
If you don't have a MIDI controller yet, we recommend the Akai APC40 MKII. It's quite expensive, but it has many pads and knobs and many other visual-related programs like Resolume work really well with it. Modulaser also has very good for support it. Of course, any other MIDI controller works too.
First step: connect your MIDI controller to your computer. Open Modulaser, go to the preferences (tip: use control or cmd + comma) and click on MIDI. You should now be presented with a screen like this:
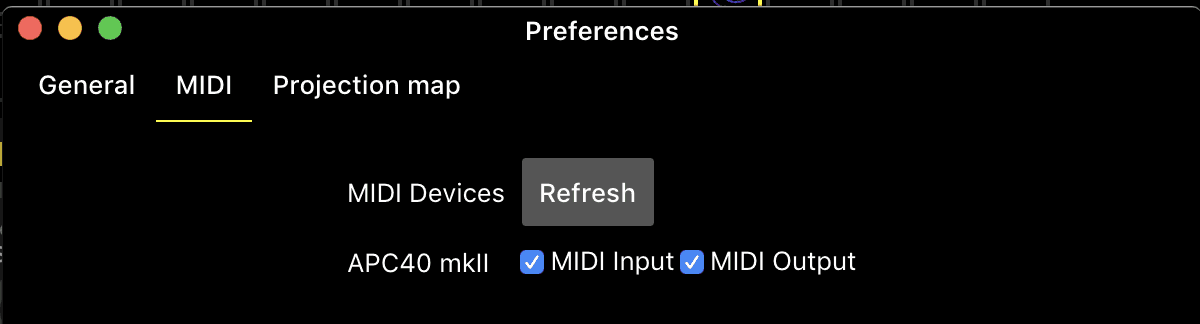
Check MIDI Input so Modulaser can listen to signals from your MIDI controller. Optionally check MIDI Output as well if you want Modulaser to send back signals to your MIDI controller. This comes in handy when you want Modulaser to always sync the knob values to your controller (not all controllers have this capability).
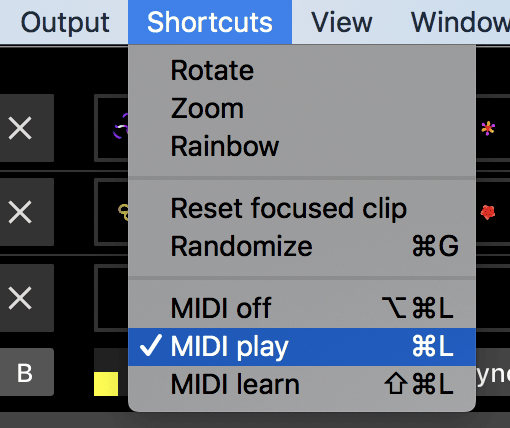
Allright, close the preferences and click on Shortcuts > MIDI learn in the menu.
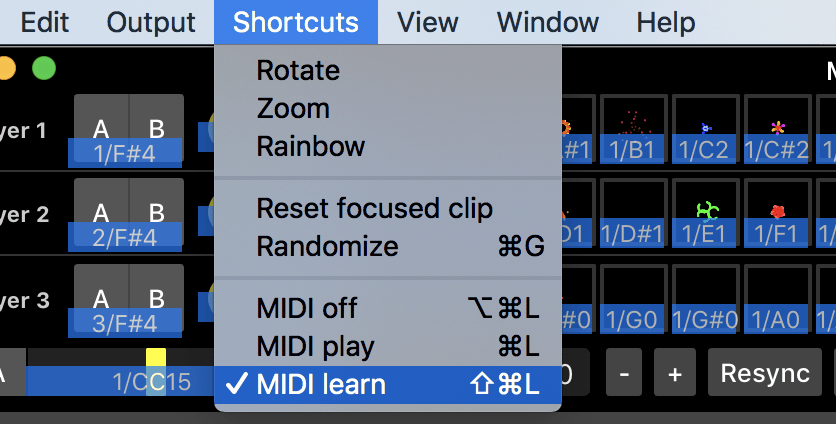
All the knobs and buttons in Modulaser that can be assigned to a MIDI knob or pad will get a blue bar under them. This bar shows the current MIDI assignment.
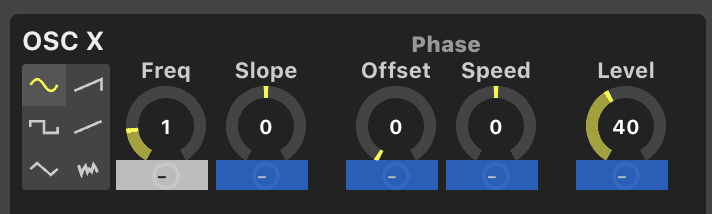
Click on a knob in Modulaser that you want to assign to a knob on your MIDI controller. For example, the OSC X Freq knob. A white bar under the knob means that its selected:
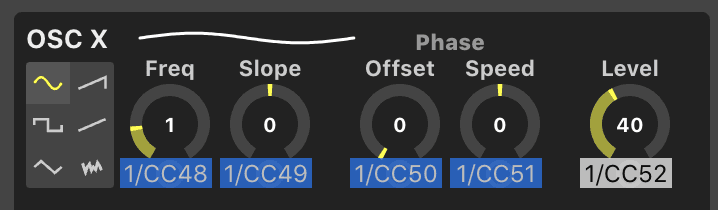
Now, on your MIDI controller, turn any knob you want to assign to the current selection. The bar under the knob should now for example say 1/CC48. Repeat the process for other knobs you want to assign; first select the knob in Modulaser, then turn the knob on your controller.
It's also possible to assign MIDI knobs to, for example, an LFO. If you assign the LFO 2 Freq knob to a MIDI knob, it will always be assigned to LFO 2, even when you switch between clips. So if another clip only has 1 LFO, nothing will happen for that clip.
You can also assign clips to pads on your MIDI controller. It works about the same as a knob, select a clip in Modulaser first, then press a pad on your controller.
When you're done assigning stuff, click on Shortcuts > MIDI play in the menu. Do this everytime you want to use MIDI. Play with your MIDI controller and you should see the knobs in Modulaser being changed!
Miss anything here or questions?
Please contact us at info@modulaser.app!